

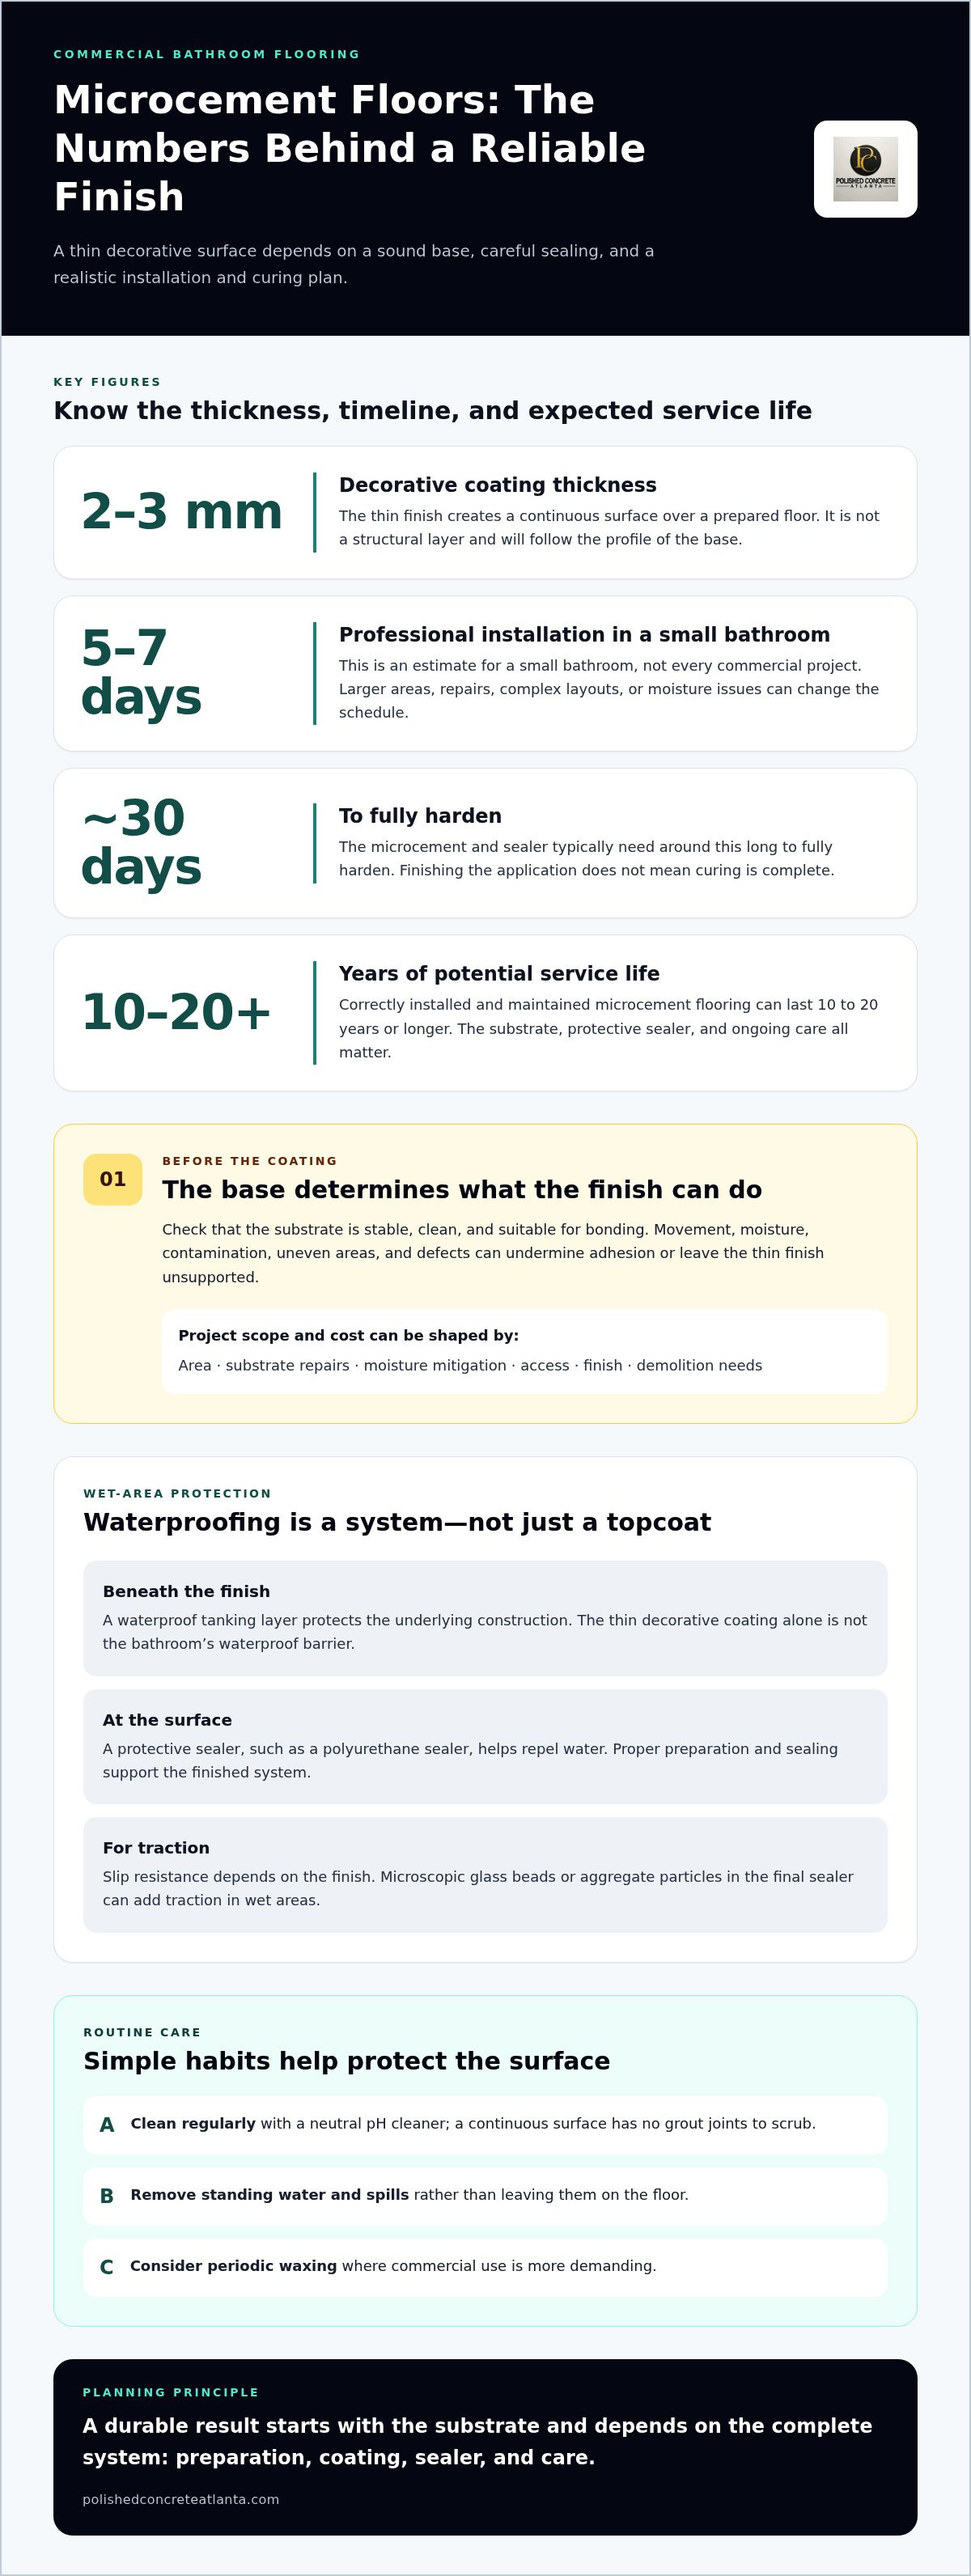
A commercial microcement bathroom floor pairs a seamless decorative finish with a carefully prepared base. The coating is typically 2-3 mm thick, but its performance depends on proper installation and sealing, especially in wet areas. A sleek surface is only part of the job.
When planning a commercial bathroom, look beyond appearance: substrate condition, moisture, foot traffic, and slip resistance all affect the finished floor. A microcement bathroom floor can create a continuous surface, but preparation and the protective system matter just as much.
This guide explains what commercial microcement flooring involves, which project details affect installation and cost, and how routine care helps protect the surface. You’ll also learn why slip resistance needs close attention in bathrooms, so you can decide whether this finish suits your space and what a reliable result requires.
Key Takeaways
- Assess substrate condition, moisture, room layout, and finish requirements to understand what can shape installation scope and cost.
- A continuous, grout-free surface can simplify routine cleaning, but standing water should be removed rather than left to linger.
- Use a neutral pH cleaner for regular care, and consider periodic waxing where commercial use is more demanding.
- Slip resistance depends on the finish: microscopic glass beads or aggregate particles in the final sealer can add traction in wet areas.
- Compare the demands of the space with the maintenance and finish requirements before settling on a flooring system.
What is Microcement Flooring?
Microcement is a thin decorative coating made with cement-based materials and applied over a prepared surface. At 2-3 mm thick, it creates a continuous finish across commercial interior spaces without adding the depth of a conventional floor covering.
Durability depends on the substrate, protective sealer, and care after installation. These factors matter especially in bathrooms exposed to regular traffic, water, and cleaning.
Durability in High-Traffic Areas
Microcement is a thin decorative finish for commercial spaces, including high-traffic areas. In bathrooms, repeated use puts wear on the floor, so the finish and maintenance routine need to suit the space.
Correctly installed and maintained microcement flooring can last 10 to 20 years or longer. Its thinness does not make it a structural layer, so the substrate beneath must provide a stable base. A smooth finish can resist dirt and grime, while commercial use still calls for routine cleaning with a neutral pH cleaner. The finish and upkeep work together; neither replaces sound installation.
Waterproofing and Stain Resistance
A waterproof microcement bathroom floor relies on the complete system, including a protective sealer and a waterproof tanking layer beneath the finish. The thin decorative coating alone is not the bathroom’s waterproof barrier.
Polyurethane sealers help repel water, while the tanking system protects the underlying construction. Preparation means addressing the base before coating, including removing contaminants and correcting defects that could interfere with adhesion. Microcement can cover a prepared floor, but it cannot fix a weak or unsuitable base. Its smooth surface resists dirt and grime, but clean up standing water and spills instead of leaving them on the floor. Proper sealing and prompt cleaning support stain resistance.
Cracking and Delamination Risks
Cracking and delamination can occur when the thin coating loses support or adhesion, or when the substrate moves beneath it. A decorative finish cannot compensate for problems in the base.
Movement, surface defects, or poor preparation can stress the coating; contamination or moisture can also compromise bonding. For example, a loose or uneven area beneath the finish can leave it unsupported and increase the risk of damage under repeated traffic. Assess and prepare the substrate before application instead of covering defects with microcement. If cracks or separation appear, address the underlying cause as well as the visible surface, or the problem may persist after repair.
Microcement flooring costs and installation factors
Repair or replacement pricing depends on project conditions and is provided after a quote request. Area, substrate repairs, moisture mitigation, access, finish, and demolition needs all shape the scope.
A professional installation in a small bathroom takes roughly 5-7 days. The microcement and sealer typically take around 30 days to fully harden.
Installation Over Existing Surfaces
Microcement can go over some existing surfaces when the base is suitable, potentially reducing demolition and preserving the existing floor assembly.
The existing surface still needs preparation. It must be stable, clean, and suitable for bonding; loose material, uneven areas, or defects can compromise the finish. For example, hollow or moving sections of an old floor need attention before coating. The substrate’s condition, not the minimalist appearance, determines whether an overlay is practical. Depending on the surface, preparation may include grinding, leveling, or moisture mitigation.
A thin coating follows the base profile, so it will not hide every flaw. Existing transitions, drains, and edges also affect detailing. Mapping these features before work begins helps define preparation needs and reduces surprises during installation.
Installation Disruption and Project Timing
Disruption depends on preparation, application, and curing time. Commercial operators need to account for this when planning bathroom access and daily business activity.
The 5-7-day estimate applies to a professional installation in a small bathroom, not every commercial project. Larger areas, complex layouts, repairs, or moisture issues can change the schedule. The coating and sealer typically need around 30 days to fully harden, so reaching the end of application work doesn’t mean the system has completed curing.
Plan for both installation and the time the finish needs to harden. A clear work sequence coordinates preparation, coating, sealing, and access restrictions. If staff or customers use the bathroom, scheduling the work around its use can help manage disruption. The visible drying stage is not the only timing consideration.
Professional Installation and Product Quality
Professional installation matches preparation and application to the substrate and bathroom conditions. Because the finish is thin, defects beneath it can affect the completed surface.
Product quality and workmanship both influence the result. Consistent application, suitable bonding, and correctly applied sealer help create a durable coating. Color and finish options can support a restrained aesthetic, but appearance should follow the space’s needs. Choose the finish with traffic, cleaning, and wet-area use in mind.
Compare costs only when the scope is consistent. Preparation, removal, moisture mitigation, repairs, detailing, and sealing can all affect the project. Avoid demolition when the existing base is suitable, but do not preserve an unstable surface simply to reduce removal. The substrate’s condition carries through to the finished floor.
How do I maintain a Microcement Coating?
A continuous microcement surface has no grout joints to scrub, so routine care focuses on the coating and sealer. In commercial bathrooms, remove soil and water regularly, use a neutral-pH cleaner, and clean spills before they become persistent stains. A simple, consistent routine protects the finish without abrasive cleaning.
Clean the Continuous Surface
First, remove loose dirt with a soft broom or suitable dust mop. Then clean with water and neutral soap, using a cloth or mop that will not scratch the coating. For regular commercial cleaning, choose a neutral-pH cleaner. This removes everyday residue without harsh methods.
Grout-free does not mean maintenance-free. Check around drains, fixtures, and edges, where residue can collect even without grout lines, and clean those areas during the same pass. Rinse away any remaining soap or cleaner with clean water, then dry the floor. Use a clean cloth for smaller areas.
Do not leave puddles standing for too long. After a spill or splash, remove the water and clean the area. This is especially useful near sinks and shower entrances, where water and soap can remain after use. Prompt cleaning also makes changes in the sealer or coating easier to spot.
Set a Routine for Commercial Use
Match cleaning frequency to traffic and visible soil. A busy office restroom may need attention throughout operating hours, while a quieter space may need fewer cleaning passes. In either case, use a neutral-pH cleaner for routine care and avoid abrasive pads that can wear the protective finish.
- Remove loose dirt before wet cleaning, so grit doesn’t rub across the coating.
- Clean spills and stains promptly with water, neutral soap, and a cloth.
- Keep puddles from sitting on the floor for extended periods.
- Inspect the surface during routine cleaning for residue or sealer wear.
These steps make a custom finish easier to care for, but they do not replace proper sealing. The coating goes over a prepared substrate, and the sealer remains the protective surface layer. Choose cleaning products compatible with the finish instead of defaulting to a stronger cleaner.
Protect the Sealer
For floors exposed to more aggressive use, repeat waxing every two months. Wait at least 15 days after sealing a newly installed microcement floor before waxing. This timing gives the sealed surface a defined care interval and avoids applying wax immediately after installation.
A six-month waxing interval may apply to household floors, but commercial bathrooms with heavier use need a more frequent schedule. Watch for dull or uneven areas during regular cleaning, and record waxing dates. Do not assume an outdoor maintenance routine suits an indoor bathroom; match care to the actual finish and use.
Microcement bathroom floor slip resistance
For a commercial microcement bathroom floor, traction depends on the finished texture and sealer, not appearance alone. Consider wet foot traffic, cleaning practices, and how each area is used when selecting the surface.
Plan commercial bathroom flooring around applicable building codes and ADA accessibility requirements. A coating or classification alone does not establish that the complete floor design meets those requirements.
Microcement, tile, epoxy, and polished concrete produce different surfaces. Compare their actual texture, joints, and sealing systems for the bathroom conditions instead of assuming one material category is automatically safer.
Slip Resistance and Surface Texture
Surface texture describes the feel and profile of the finished floor, and affects how it interacts with footwear when wet. This matters in commercial bathrooms, where splashes and tracked-in water can change underfoot conditions.
For wet areas, microscopic glass beads or aggregate particles can be added to the final sealer coat to create an anti-slip surface. Discuss the intended texture alongside the bathroom’s use and cleaning routine. The finish should balance traction with practical upkeep.
Sealing is part of the system, so consider texture when specifying the final coat. A floor near a sink may get frequent splashes, while a dry entry zone has different demands. Specify where added texture is needed instead of treating every part of the room alike.
R9 Slip Resistance Classification
R9 is a classification label that may appear in a flooring specification, but the label alone doesn’t describe how a particular installed floor performs in a wet bathroom. It matters because specifications need to be considered alongside the actual finish and room conditions.
For a commercial microcement bathroom floor, review the stated classification together with the texture and sealer details. A label does not show whether glass beads or aggregate particles are included in the final coat. Align the finish selections and product documentation so the specified floor suits its intended use.
Microcement is applied in layers and typically measures 2-3 mm thick. The thin coating creates a continuous finish, while its texture and sealing influence the underfoot surface. Tile, epoxy, and polished concrete also vary by finish, so compare specific proposed surfaces rather than general material names. Microcement is described as resistant to scratches and abrasions in commercial spaces, but that property is separate from slip resistance. Scratch resistance concerns surface wear; traction concerns contact underfoot.
In a commercial microcement bathroom floor, cleaning and water management remain relevant to the floor’s use. Choose the surface with wet conditions and the required accessibility design in view. Discuss commercial flooring needs for a project evaluating concrete surface options.
Polished Concrete Atlanta: Polished Concrete Floors
Polished Concrete Atlanta helps commercial property owners assess flooring options and prepare concrete surfaces for a finished floor. If your project calls for a finish other than microcement, consider Polished Concrete Floors, Epoxy Flooring, or Stained Concrete based on the space and its use.
Assess the floor before applying any finish. Polished Concrete Atlanta provides Floor Preparation to ready concrete for the selected system. Share details about the bathroom’s use, existing floor, cleaning needs, and desired appearance to focus the discussion on practical requirements.
For a commercial flooring project in Atlanta, contact Polished Concrete Atlanta to discuss your needs, or visit polishedconcreteatlanta.com.
Choose the Right Next Step for Your Floor
Let the bathroom’s daily demands guide your flooring decision. Before choosing a finish, weigh the intended look against practical priorities such as cleaning, wet-area use, and how the space will operate during installation. A commercial microcement bathroom floor is one option; choose a system whose finish and preparation suit the project’s actual conditions.
If you are considering alternatives, Polished Concrete Atlanta offers Polished Concrete Floors, Epoxy Flooring, and Stained Concrete. These options provide a starting point for discussing which concrete finish fits your commercial flooring goals. Share what matters most, from appearance to use, and focus the decision on a surface suited to your operation.
Contact Polished Concrete Atlanta today to discuss your commercial flooring project. A clear plan is the first step toward a finish you can feel confident moving forward with.
Frequently Asked Questions
Can microcement go over tiles?
Yes, microcement can go over existing tile when the tiles are firmly bonded and the surface is prepared. Loose, cracked, or hollow-sounding tiles need attention because movement underneath can compromise the new finish. Tile joints also need suitable treatment to help prevent them from showing through the coating. The deciding factor is the floor’s stability, not simply whether it is tiled.
Is microcement the best solution for high-traffic commercial areas?
Microcement can suit high-traffic commercial areas, but no flooring finish suits every operation. Consider how the space is used, its cleaning routine, wet conditions, and the desired surface texture. For instance, while a clinical setting such as a skin cancer clinic Townsville might look to seamless surfaces to support strict hygiene and easy disinfection, a busy washroom has different demands from a dry customer reception area. Compare those requirements with the complete floor system and maintenance plan before choosing a finish.
Can microcement go over any substrate?
No. Microcement needs a stable, compatible substrate; a coating cannot make an unsuitable base sound. Assess concrete, tile, and other existing surfaces for movement, contamination, moisture, and defects before application. A loose layer or a base that flexes can affect adhesion and the finished surface. The substrate’s condition determines the necessary preparation and whether an overlay is appropriate.
Do I need to prepare the substrate?
Yes, substrate preparation is essential because the coating bonds to that surface. Preparation addresses dirt, residue, unevenness, and other defects that could interfere with adhesion. In a renovation, this may mean removing contaminants or correcting an uneven section before applying the finish. Skipping preparation does not resolve underlying problems; those defects can affect the result after installation.
Does microcement de-laminate?
Yes, microcement can delaminate, meaning sections of the coating separate from the substrate. Poor adhesion, substrate movement, moisture, or inadequate preparation can contribute to separation. Bubbles, lifting edges, or hollow-sounding areas can signal that the finish has lost its bond. Address the underlying cause as well as the visible area, since covering separation without fixing its cause can leave the floor vulnerable to recurring damage.
How is microcement elevating modern commercial spaces?
Microcement lets designers carry a coordinated finish across different surfaces, creating a unified look in modern commercial interiors. For example, related finishes across floors and walls can avoid dividing the design into separate visual zones. In Atlanta commercial renovations, this flexibility can connect reception areas, washrooms, and adjoining spaces. The design can balance visual continuity with the needs of each area, often paired with complementary decor such as office wall art from Panther Print to bring warmth and character to client-facing rooms.


